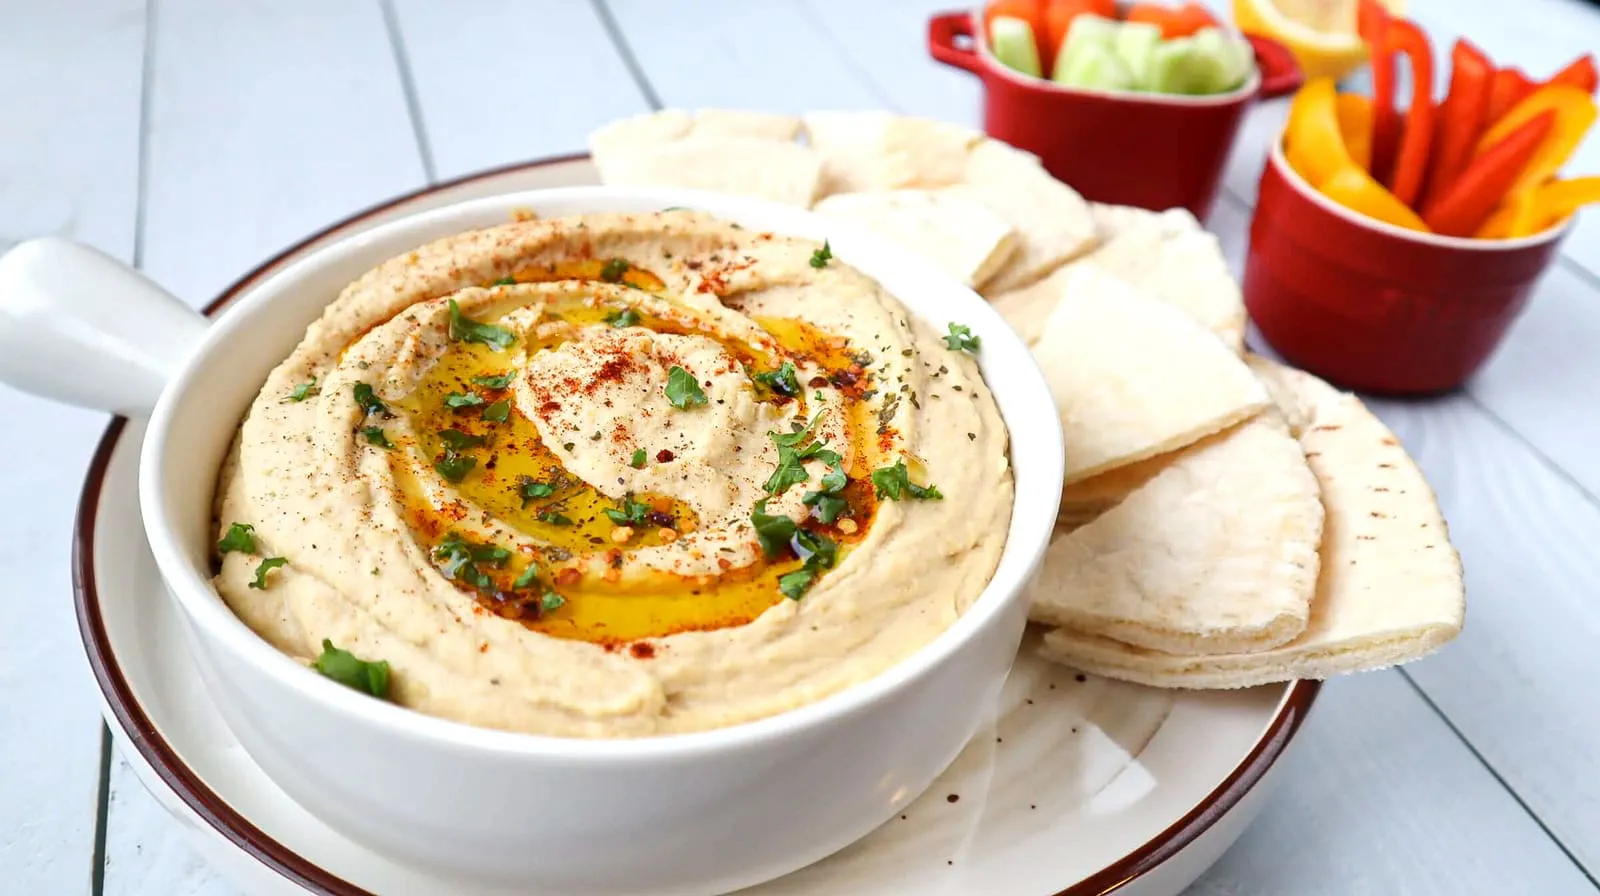
Classic Hummus from Dried Chickpeas
Classic Middle Eastern hummus made with chickpeas, tahini, garlic and lemon juice. The secret is starting with dried chickpeas for the silkiest, creamiest texture.
By Amanda Chang
Jump to recipe ↓This page was machine-translated and may contain errors.
Hummus, from the Middle East, is a world-famous classic made from chickpeas, tahini, garlic, and lemon juice. People love it for its silky, creamy texture that’s rich without being heavy. So how do you make the creamiest hummus? The secret is using dried chickpeas. Start by cooking dried chickpeas to make the most classic and delicious hummus. Once you try this recipe, you’ll never go back to canned or store-bought hummus, and it’s even better than what you get at restaurants.
You’re probably wondering how on earth you cook dried chickpeas, and whether it’s a big hassle. It’s really not. It takes a little more time, but the result is unbelievably rich and creamy, with a deep nutty aroma, perfectly balanced by the bright tang of lemon juice.
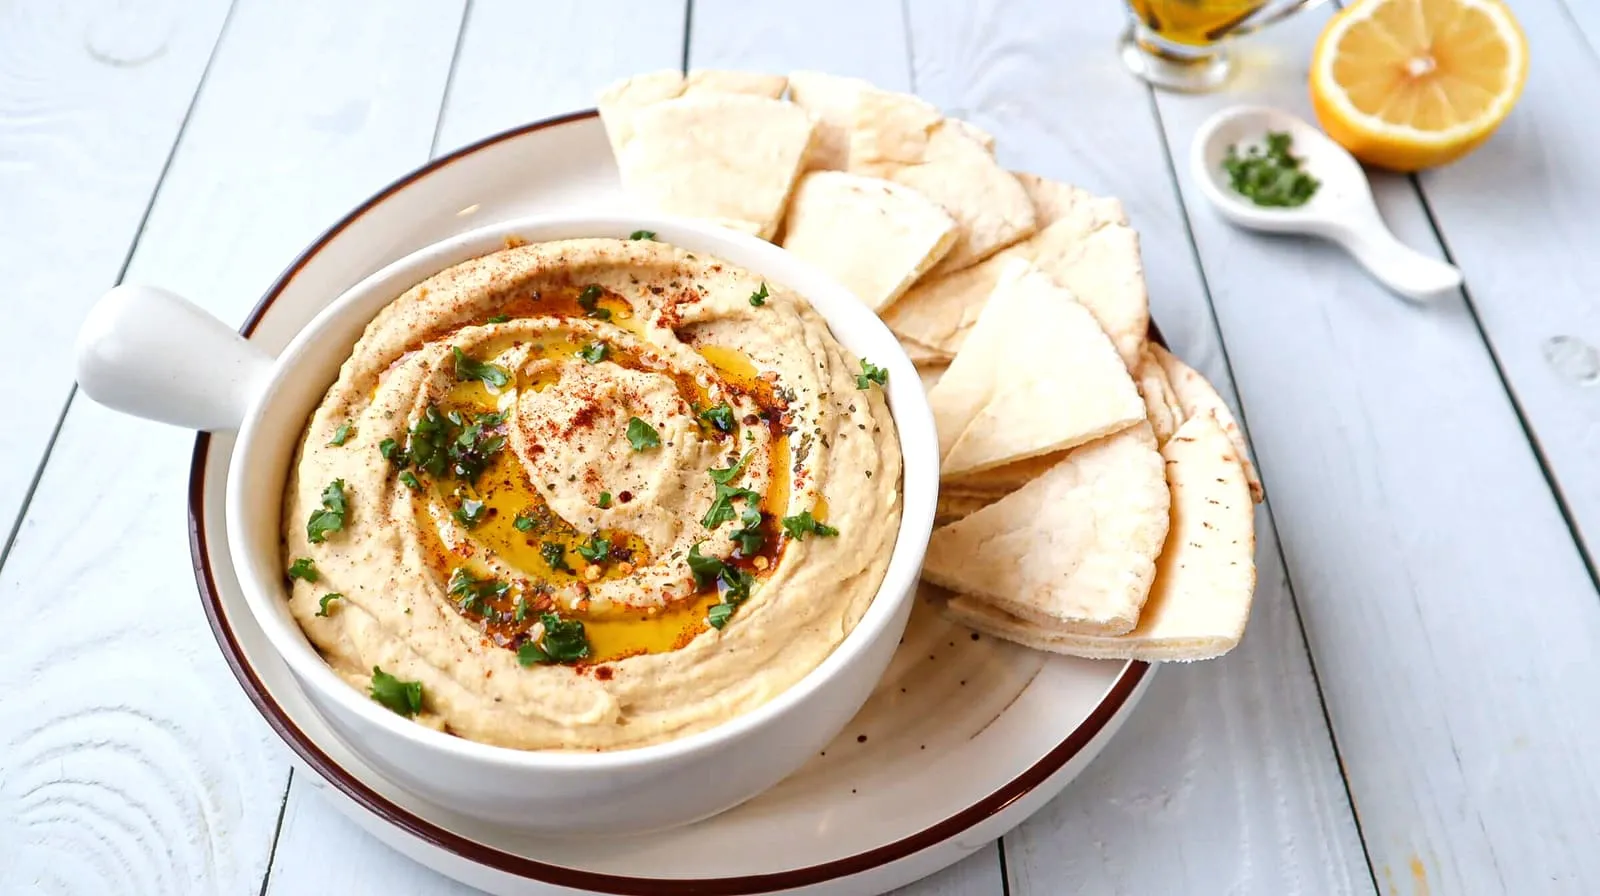
Hummus, from the Middle East, is a world-famous classic dish
I have to admit that before I’d ever eaten hummus, my first reaction on hearing “chickpea puree” was: is that going to taste good? But while I was studying in the UK, my classmates and I took a little road trip to Scotland. It was another cold, damp, drizzly day, and we stumbled into an unremarkable-looking Turkish restaurant. One of my Russian classmates said, let’s order hummus. I was skeptical about the dish, right up until I tore off a piece of warm, freshly baked flatbread, scooped up some warm hummus, and put it in my mouth. From then on I saw hummus completely differently. Oh my goodness, how can a spread be this delicious?
But living in the student dorms, cooking wasn’t easy, and for a student counting every penny, the most convenient and cheapest way to get hummus was to buy the sealed tubs from the supermarket. In UK supermarkets hummus isn’t hard to find, but it never came close to that bite at the restaurant. Honestly, it was a lot worse! Later, when I worked in Shanghai, delicious hummus was just as hard to find; you had to go to an upscale restaurant to get some. Once I started learning to cook, I made it my mission to learn to make really good hummus! (Good food is such a great motivator.) After years of research and experimenting, I finally learned the secret to hummus with a rich, mellow flavor and a creamy, luscious texture!
Origins and nutrition of hummus
Chickpeas, also called garbanzo beans, are rich in dietary fiber, plant protein, many amino acids, B vitamins, calcium, magnesium, iron, manganese, and other nutrients. Because they’re so high in protein and fiber, they keep you full, and they’re a favorite ingredient among fitness enthusiasts.
Hummus means chickpea in Arabic. Hummus is a famous dish of the Middle East region, and you’ll find it on tables from the eastern Mediterranean coast across Cyprus, Greece, Armenia, Palestine, Syria, Lebanon, Turkey, Egypt, Morocco, and more, with different variations developing across regions and households. Because of that, after debate among many countries, there’s still no definitive answer to where hummus originally came from. The one thing that’s certain is that love for hummus knows no borders. In the Middle East, hummus is sold everywhere from street stalls to restaurants, at breakfast, lunch, and dinner, as a main or a side. Hummus is no longer just a dish; it plays an important role in carrying on history and culture.
Because of its texture, hummus is most often eaten as a spread or a dip. It has very few ingredients: the basics are chickpeas, tahini (sesame paste), garlic, lemon, and salt. It has a mild bean flavor, tangy and salty, with a creamy texture, and the combination of chickpeas and tahini makes it rich.
There are other variations of hummus too, with roasted red pepper, sun-dried tomato, roasted garlic, chili, and so on, but in this post I’m sharing classic hummus made with the core ingredients.
If you love chickpeas as much as I do, or want more plant-based fitness recipes, be sure to try Moroccan tomato chickpea and vegetable stew or Mexican style roasted corn, bell pepper & chickpea salad. Both are delicious dishes made with chickpeas.
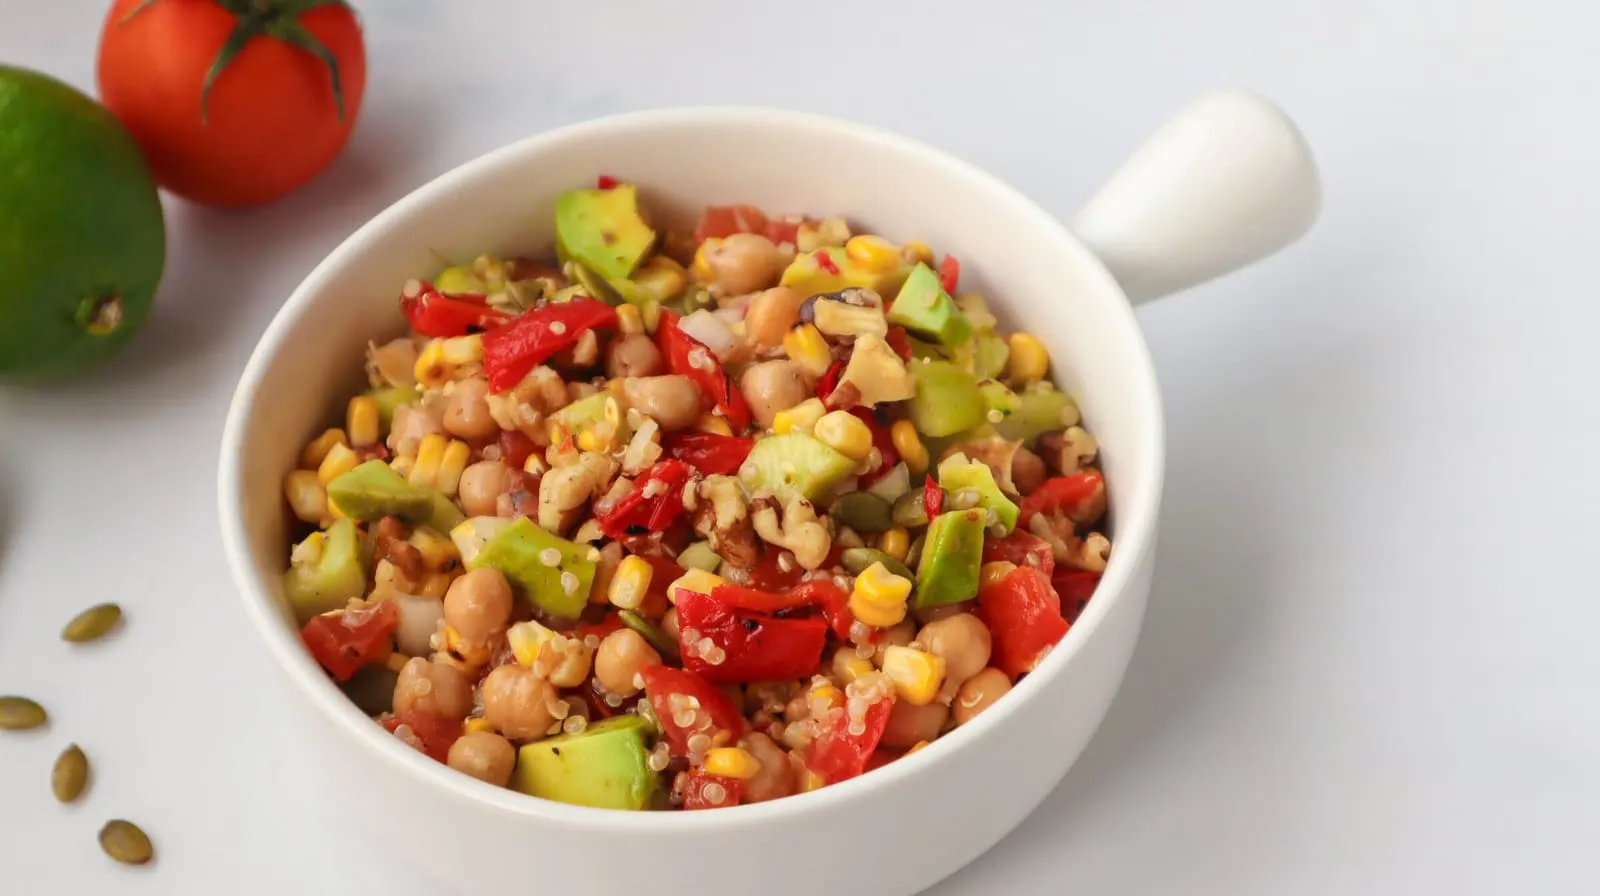
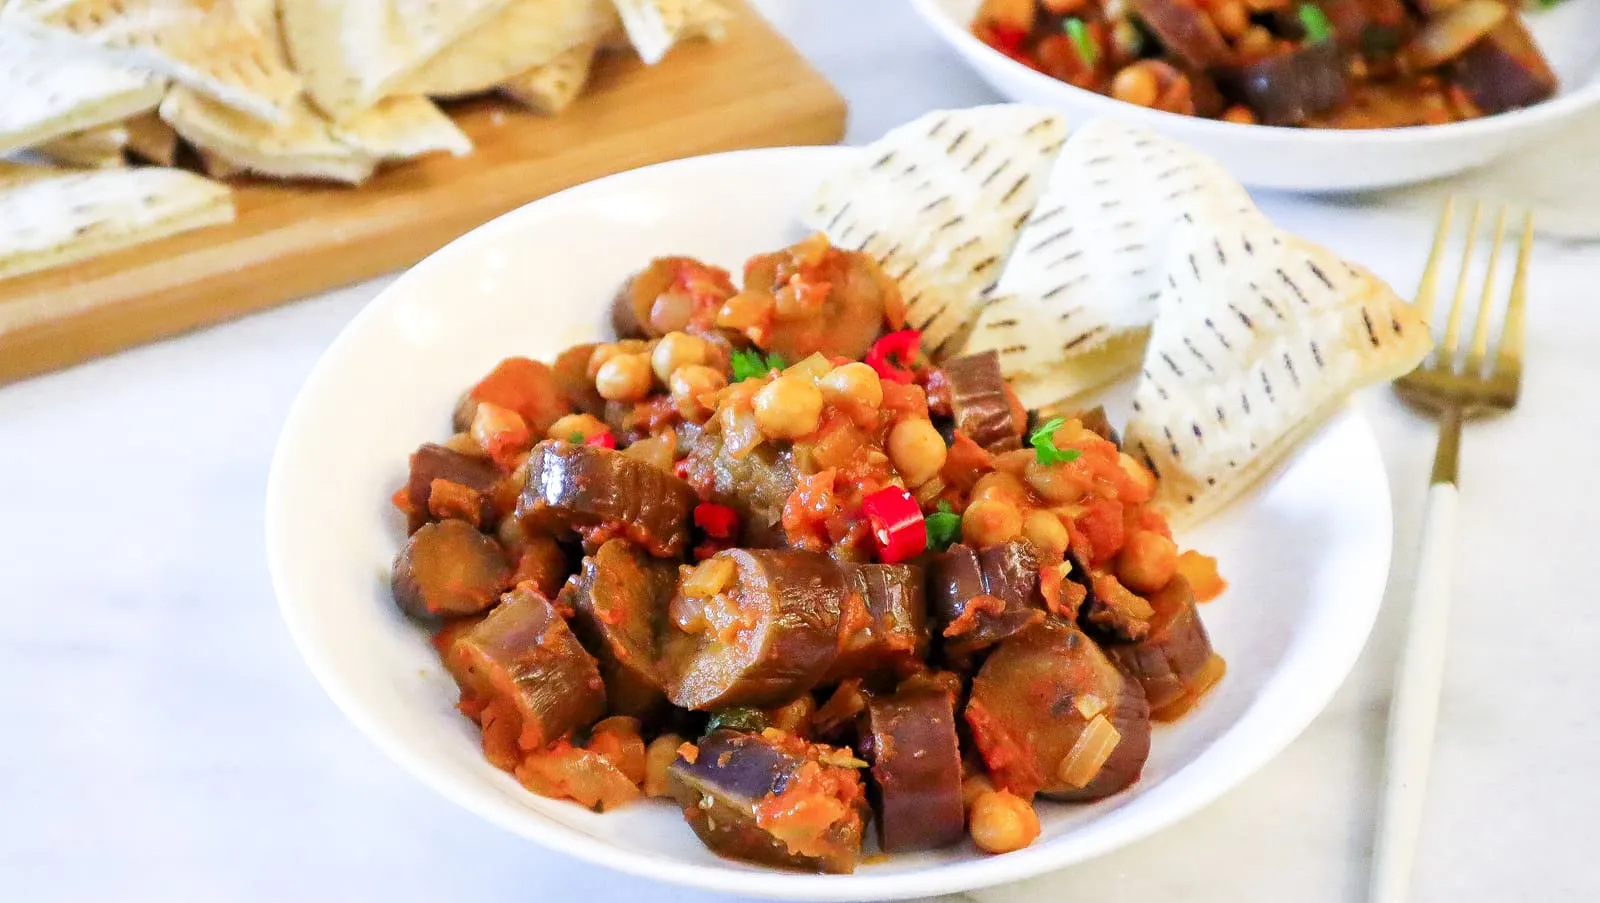
Why make your own hummus?
Homemade hummus tastes and feels completely different from store-bought.
Remember how I said I stumbled into that Turkish restaurant in the UK and had that bite of hummus I’ll never forget? Afterward, whether it came in plastic tubs or vacuum-sealed glass jars, supermarket hummus never brought back that freshly made flavor and texture. Also, at authentic restaurants hummus is usually served warm or at room temperature, while supermarket hummus, unless it’s vacuum-packed, is mostly kept in the fridge. Cold hummus feels heavy and too dense, and it doesn’t have the bean aroma of freshly made hummus.
So what’s the texture of the most delicious hummus?
I think the best hummus is fine and creamy. It’s rich, yes, but its texture is full, light, slightly fluffy, and a little moist, never so dense, heavy, or dry that it’s hard to swallow. Only freshly made hummus, especially hummus made from dried chickpeas you cook yourself, gives you that nutty aroma of chickpeas blended with the other ingredients.
Ingredients for classic hummus
Classic hummus needs only the fewest, most basic ingredients to create something incredibly delicious, which is exactly why you should make it at home. There are only a few ingredients, but every one of them matters, so try to buy good-quality ones.
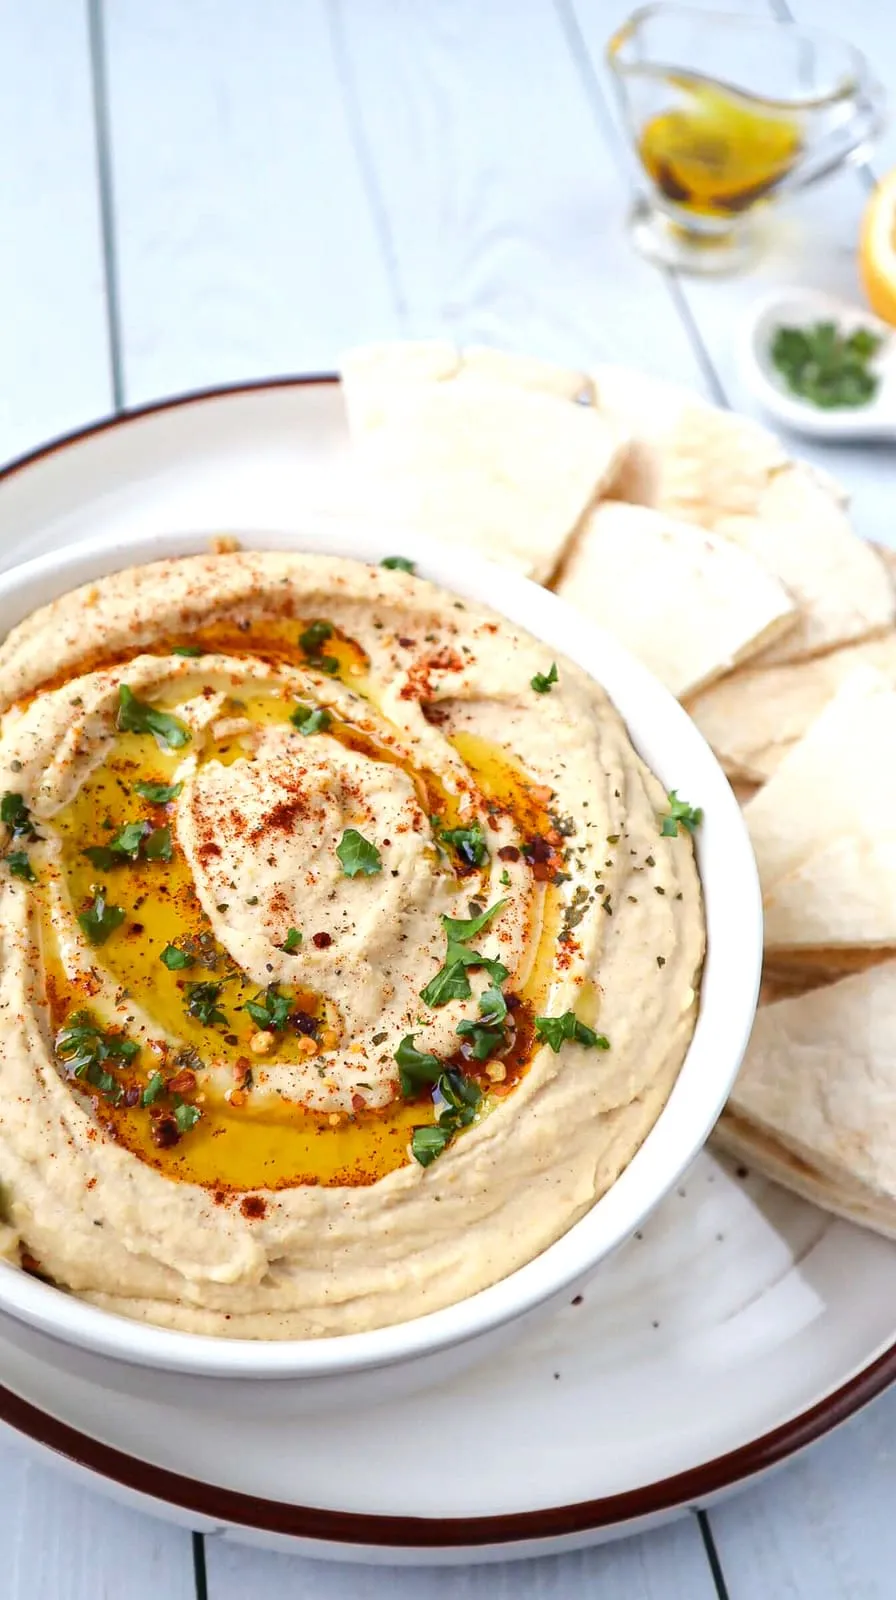
Chickpeas (dried)
The star of hummus (what else?). In Taiwan, dried chickpeas are fairly rare in regular supermarkets, but you can still find them at imported-goods supermarkets or online. Another option is canned chickpeas, which are easy to find at Carrefour and online. But I have to stress that this recipe uses dried chickpeas, because they give the best texture!
Tahini
Tahini is another very important ingredient. Unlike the white sesame paste commonly found in Taiwan, Middle Eastern tahini is made from hulled white sesame seeds, so it’s lighter in color, smoother in texture, and milder and more “refined” in flavor. But without it, hummus loses its shine. A detailed introduction to tahini: Sesame’s Secret Weapon: Tahini
Tahini is less common, so again you’ll need to look at imported-goods supermarkets or online. I usually like to buy this organic tahini on iHerb. It has a fine, mild texture and is perfect for making hummus! Highly recommended 👉 Kevala Organic Tahini
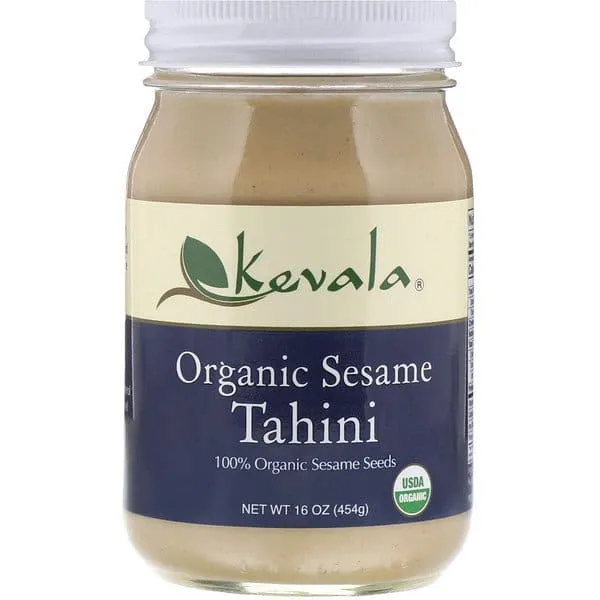
If you can only find Taiwanese-made white sesame paste, try to choose one that’s good quality but milder in flavor. Deeply roasted sesame paste has a stronger flavor and will overpower the chickpeas a bit.
Also, some recipes use olive oil instead of tahini, but traditional hummus uses tahini, not olive oil. Olive oil is usually just drizzled on top at the end, right before serving, for extra flavor.
Lemon
Lemon juice is a must-have ingredient! How much lemon juice to use really depends on the person. I personally love using a lot. Besides adding the fragrance of lemon oils and the freshness of the juice to brighten the flavor, it plays another very important role: balancing the richness of the chickpeas and sesame so the hummus is slightly tangy and never heavy. So I strongly recommend using fresh lemons, to get juice with that fragrant lemon oil.
Garlic
Fresh garlic cloves are an important seasoning! You can also use roasted garlic. Adjust how much garlic you add to your taste. I suggest starting with just a little and adding more if it’s not enough. If you add a lot at the start and it’s too strong, there’s no saving it.
Salt
No recipe is complete without salt. I use pink Himalayan salt (it’s less salty), which best preserves the natural flavor of the food. If you’re using a saltier sea salt, you might use a little less. If possible, try not to use table salt, because it tastes harshly salty. But table salt is the most convenient, so again, use a little less and add more slowly if it’s not salty enough.
Ice water
Ice water helps all the ingredients blend thoroughly and come together. Many professional chefs say that ice water, more than room-temperature water, gives hummus that silky texture, along with the full, light texture I mentioned earlier.
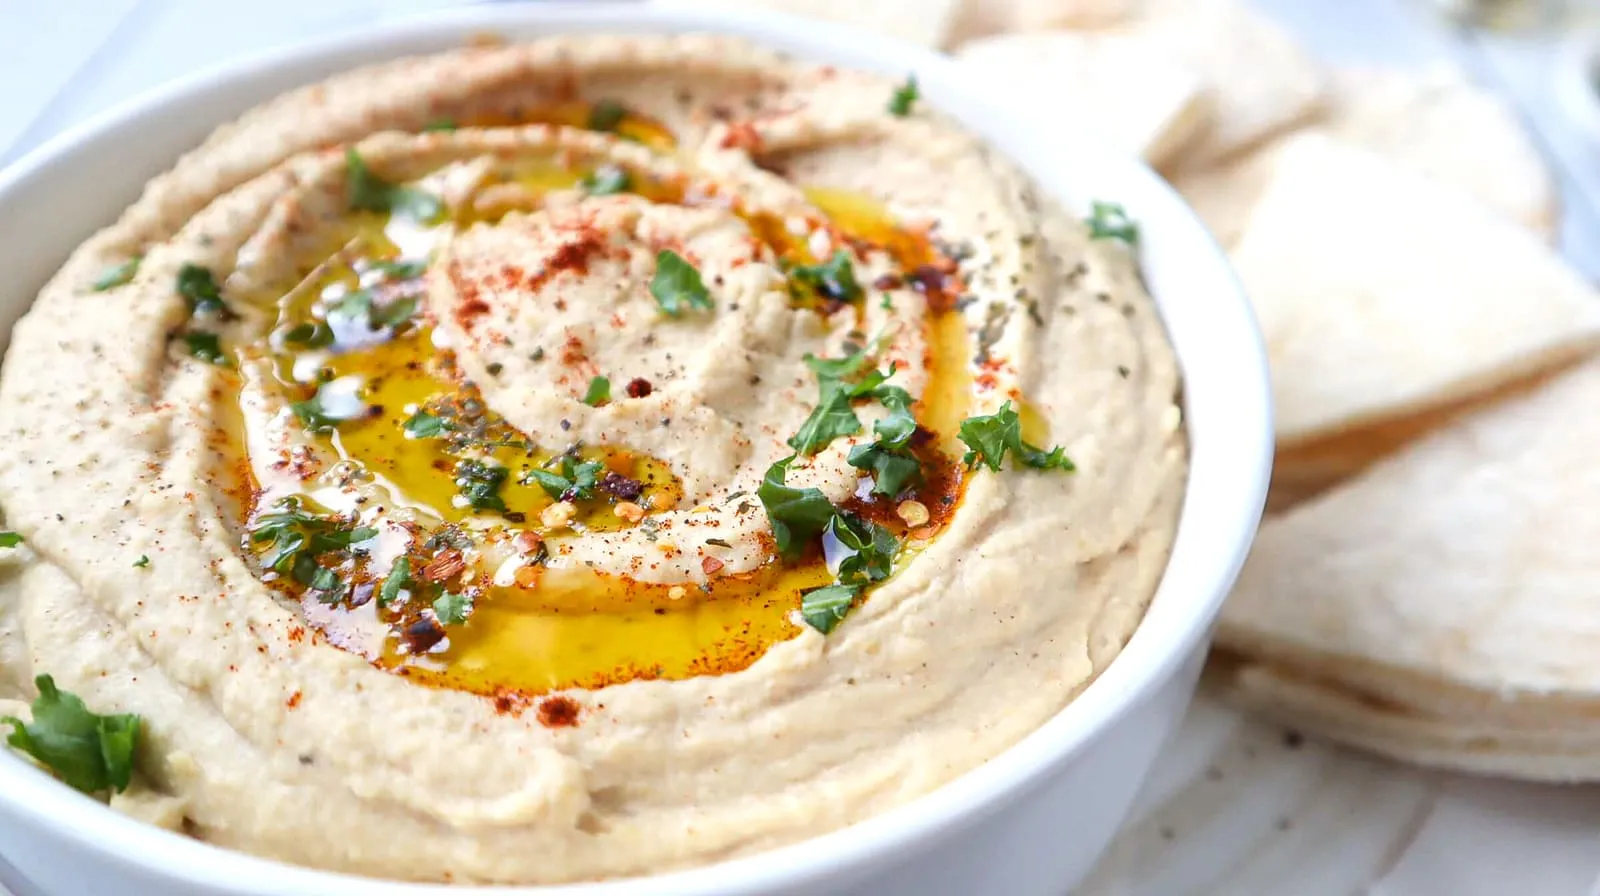
Incredibly delicious with just: chickpeas, tahini, lemon, garlic, salt, ice water
How to cook dried chickpeas
Dried chickpeas are very hard, so to help them soften faster while cooking, you need to soak them first.
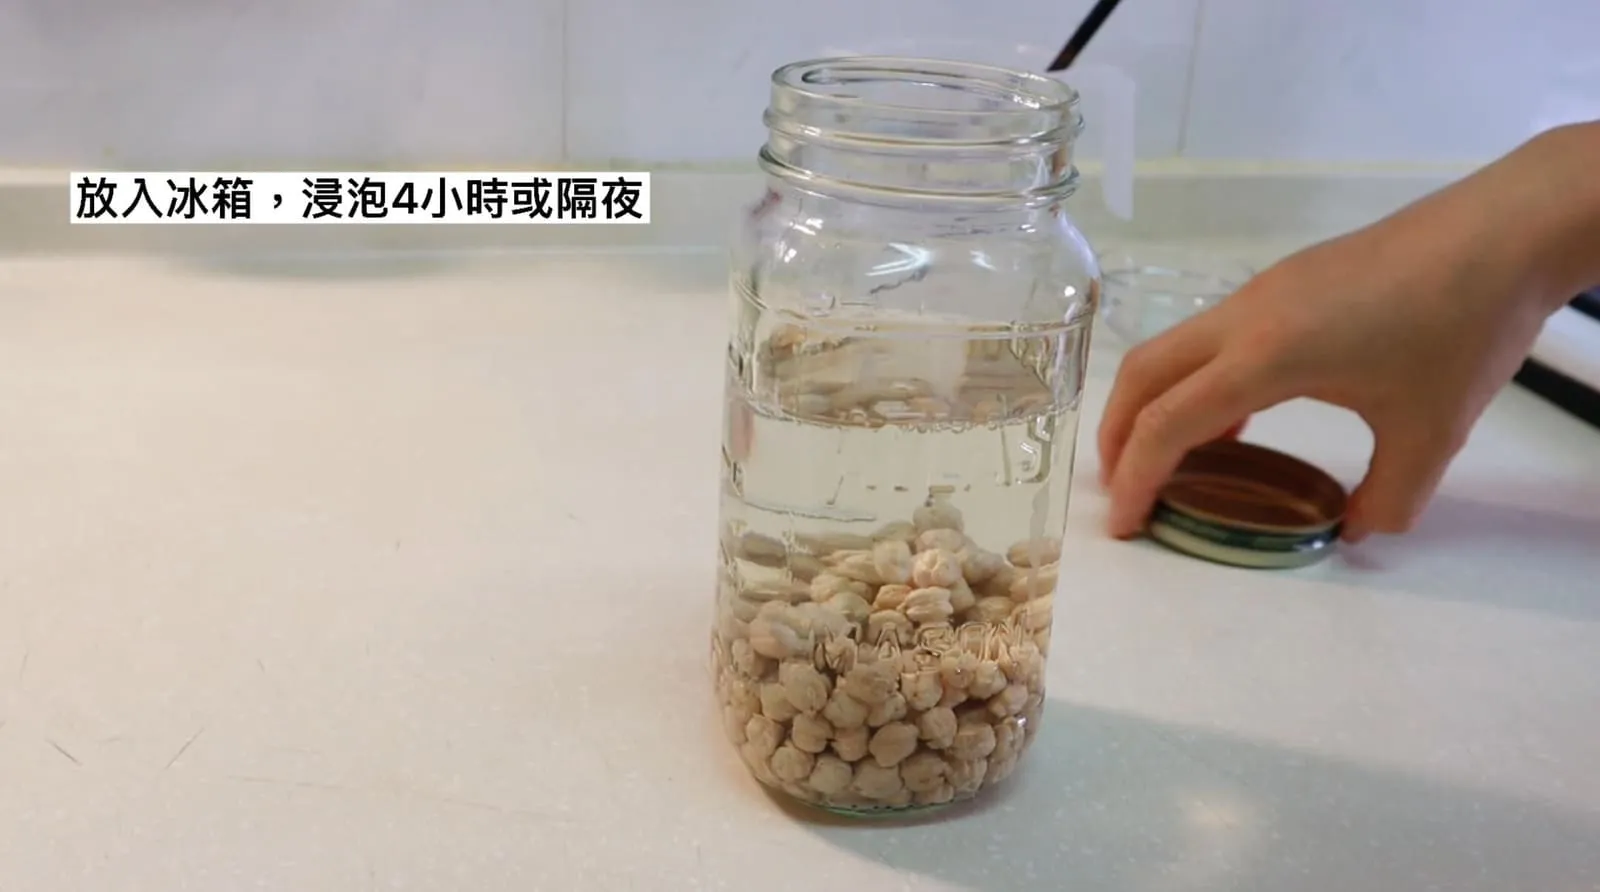
Give the chickpeas a quick rinse and put them in an airtight jar, then add 1.5L of cold water and a small spoonful of baking soda. Baking soda helps soften the chickpeas. Seal the jar and soak in the fridge for at least 4 hours, but ideally overnight (8 hours).
*Why add baking soda when soaking and cooking chickpeas?
Adding baking soda when soaking and cooking chickpeas speeds up softening and greatly shortens the cooking time (by about 1/3!). It also helps the skins separate from the chickpeas, so when they’re done cooking the skins are easy to pick out, and skinless chickpeas give a smoother texture.
How much baking soda? Generally you can use roughly this ratio:
[227g chickpeas : 1 tsp baking soda]
Drain the soaked chickpeas and give them another quick rinse (to rinse off the baking soda taste).
Cooking chickpeas on the stovetop
Put the chickpeas in a large enough pot, add 1.5L of water, then add 1 tsp of baking soda.
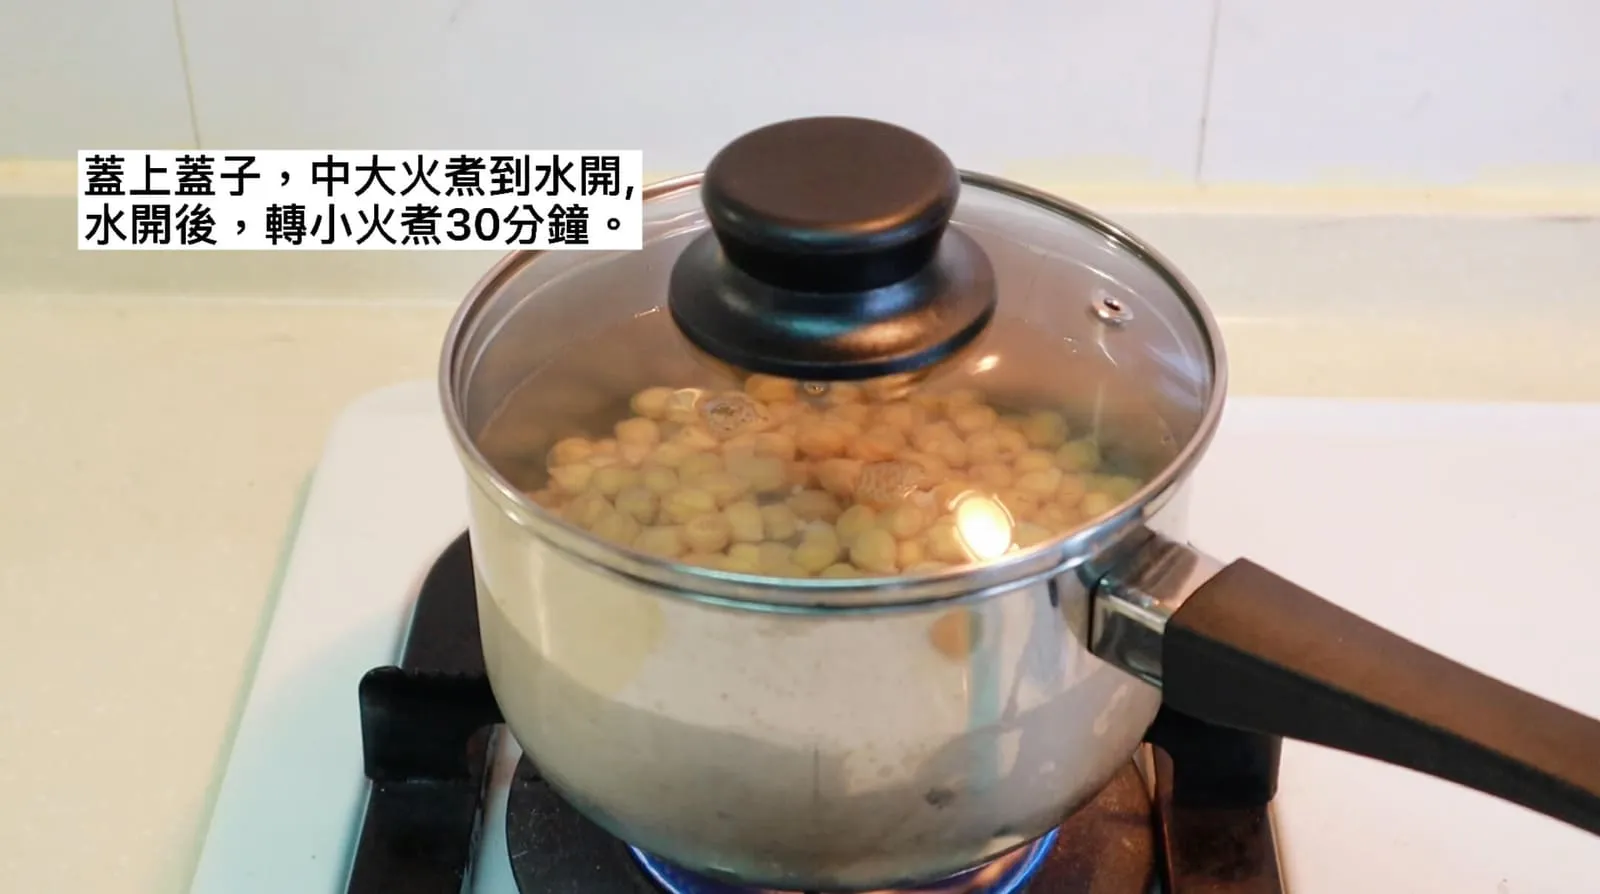
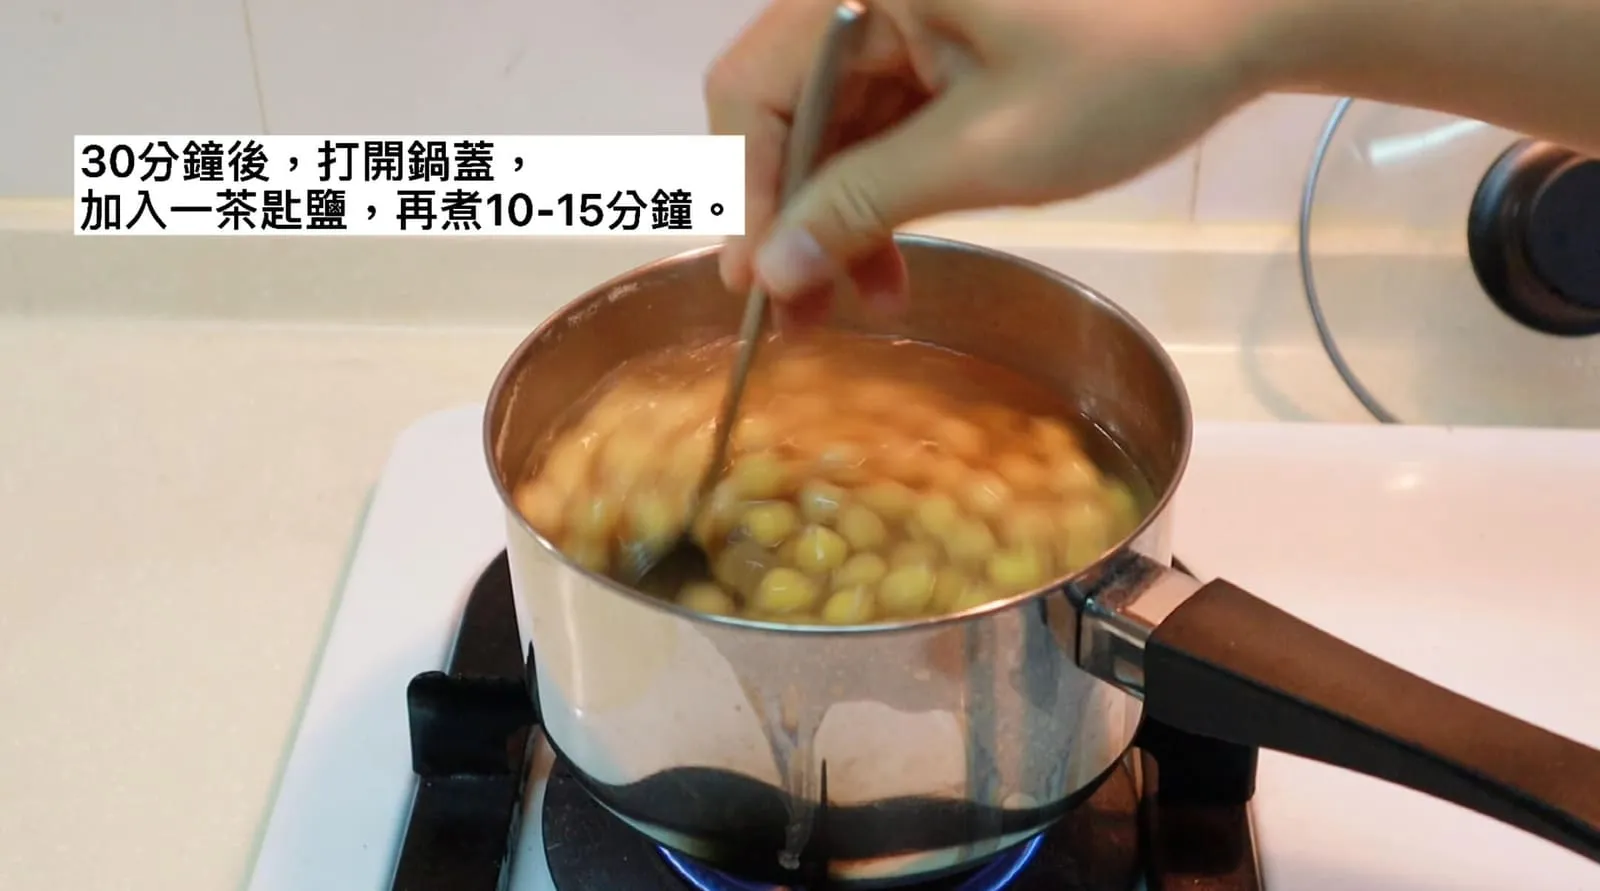
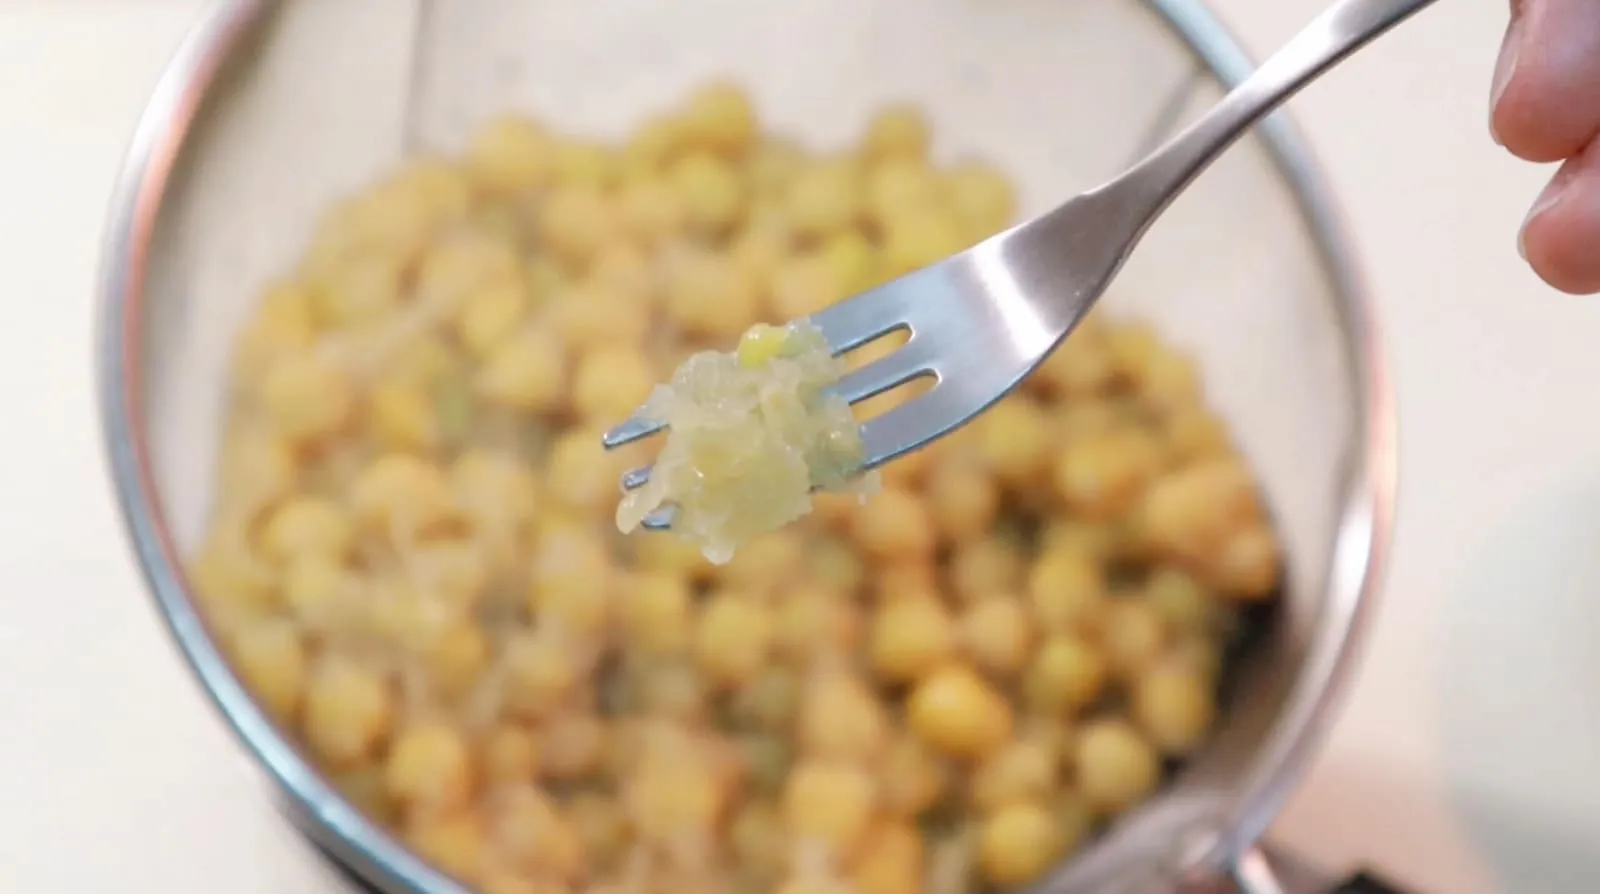
Bring to a boil over medium-high heat. Once boiling, you’ll see white foam floating on the surface; skim it off with a spoon and discard. Then turn the heat to low and simmer for 30 minutes. After 30 minutes, open the lid, add 1 tsp of salt, and cook for about 15 more minutes, until the chickpeas are very soft. To test whether they’re soft enough, press a chickpea with a fork; if it mashes effortlessly, they’re done. Since the chickpeas will be blended, they need to be cooked softer than chickpeas for salads or eating on their own.
Drain the chickpeas and pick out any skins that have come loose.
Cooking chickpeas in a pressure cooker / multicooker with a pressure function
If you’re using a pressure cooker, soak the chickpeas overnight the same way, then rinse them well. Put them in the pressure cooker, add at least 1.5 times as much water as the volume of chickpeas, then add the baking soda and salt.
Cook on pressure mode for 20 minutes, then let the pressure release completely before opening the lid.
Steps for homemade classic hummus (dried chickpeas)
Equipment you’ll need: a food processor or high-speed blender and a spatula
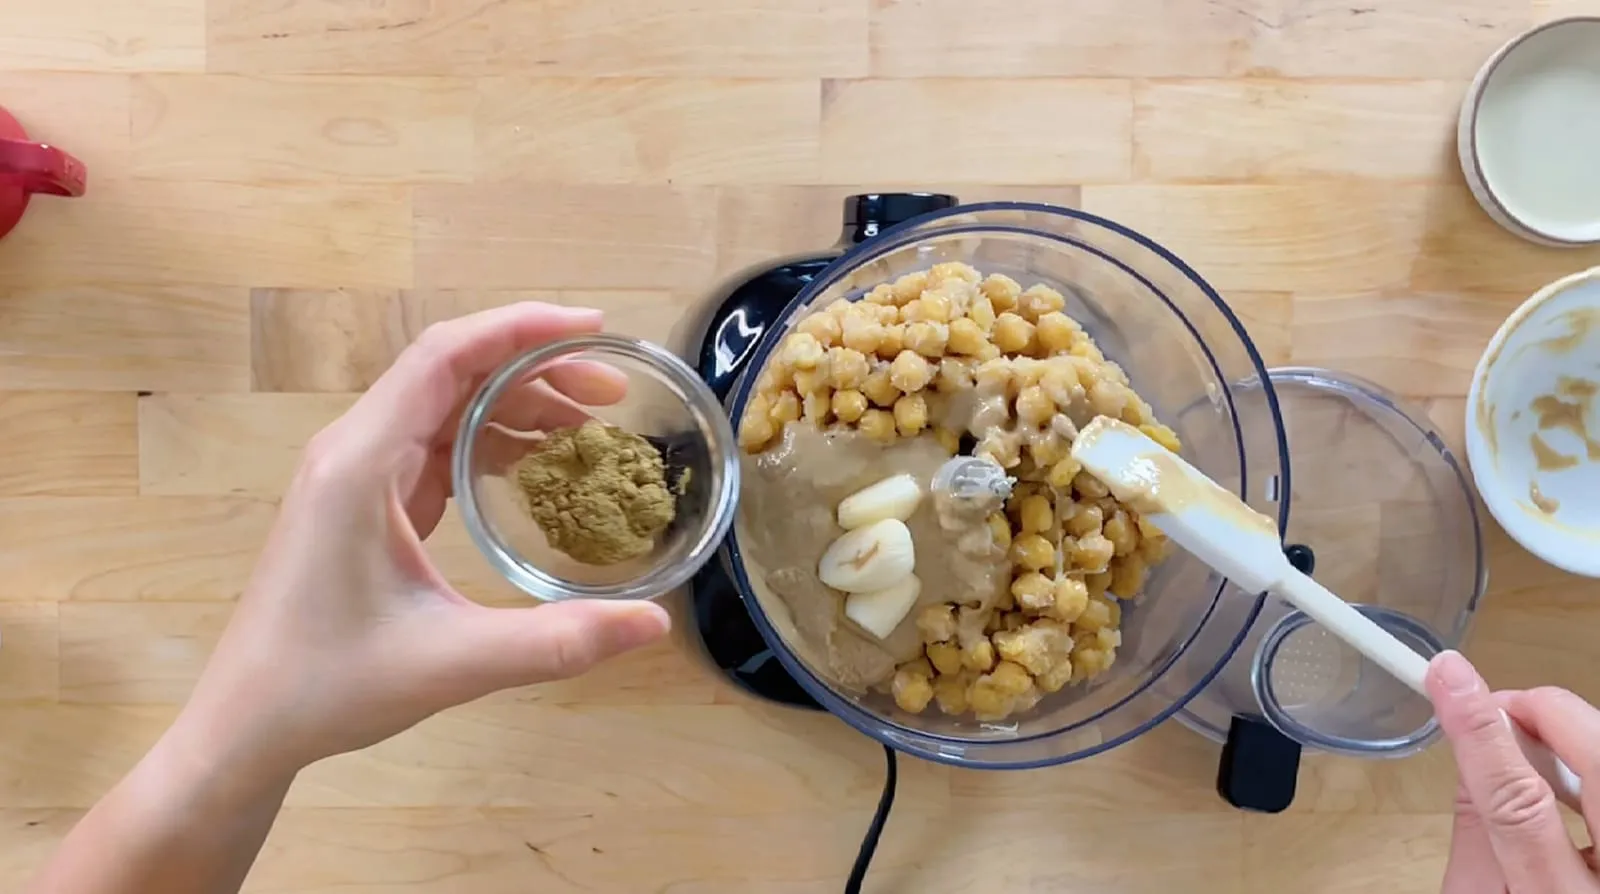
Put the cooked chickpeas in a food processor, add the tahini and garlic, and process for about 2 minutes until well combined. Stop partway through, open the lid, scrape down anything around the edges that hasn’t mixed in, and continue.
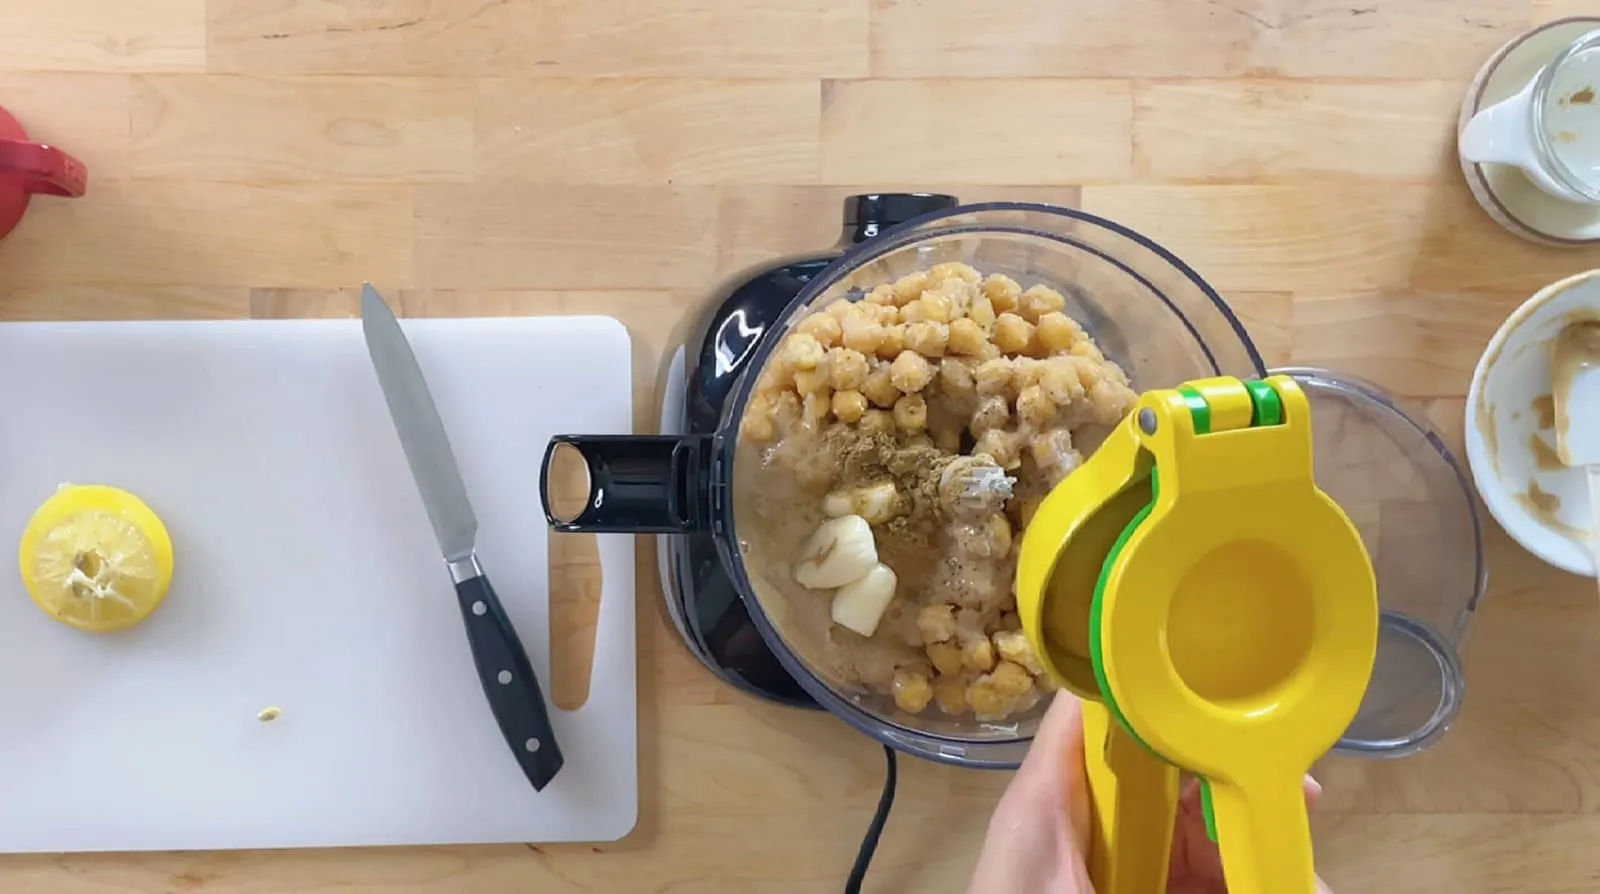
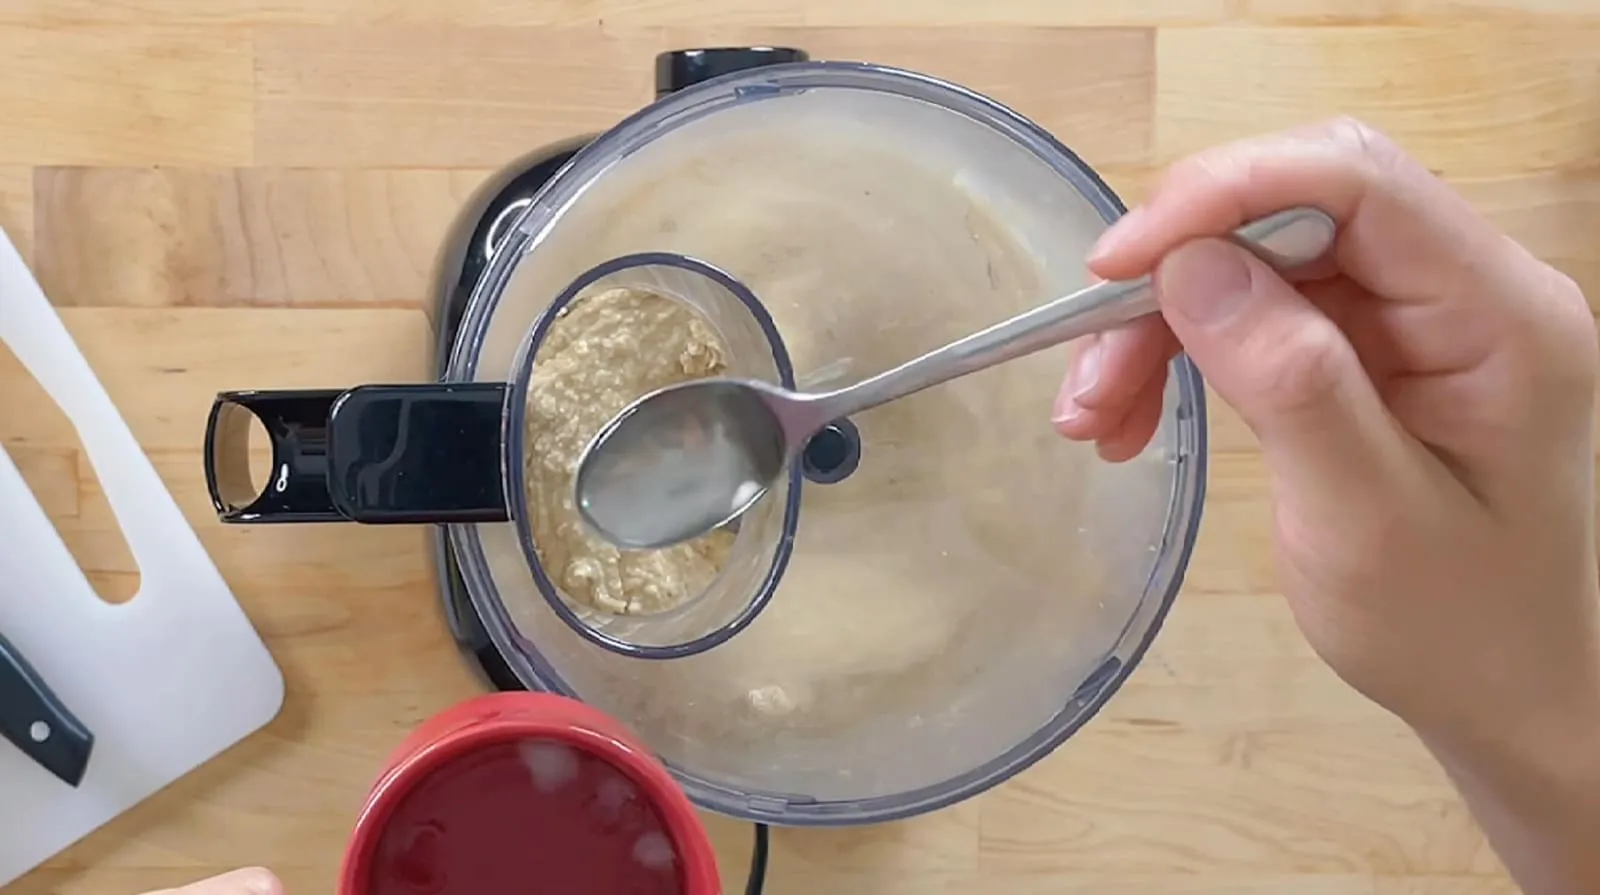
Next, squeeze in the lemon juice (careful not to let any seeds fall in), add the pink salt and a little black pepper, and keep processing. Then slowly add the ice water, one spoonful at a time, until the hummus turns creamy and smooth.
Stop the food processor, open the lid, and scoop out a little hummus to taste. If needed, add more garlic, lemon juice, salt, pepper, and so on to your liking, then process again until combined.
Pour the finished hummus into a bowl and smooth it out a little with the back of a spoon. It doesn’t need to be perfectly flat; a few swirls from the spoon look beautiful.
At this point the hummus should be slightly warm, and that’s the best time to enjoy it!
Making hummus with canned chickpeas
If you don’t have dried chickpeas, you can use canned ones. Canned chickpeas are already cooked.
A can of chickpeas usually weighs 400g-524g, which is equivalent to 2 portions of 227g dried chickpeas.
I’ve shared a super quick 5-minute version of hummus before, where you just blend canned chickpeas straight into hummus. It’s very convenient, but the texture is a little grainy.
So there’s another method that takes more than 5 minutes, but is still quicker than using dried chickpeas: put the canned chickpeas in a pot, add water (1.5 times the volume of the chickpeas), then add 0.5 tsp of baking soda. Bring to a boil over medium-high heat, then turn to low and cook for another 20 minutes, until the chickpeas are soft and their skins come off.
Ways to serve hummus
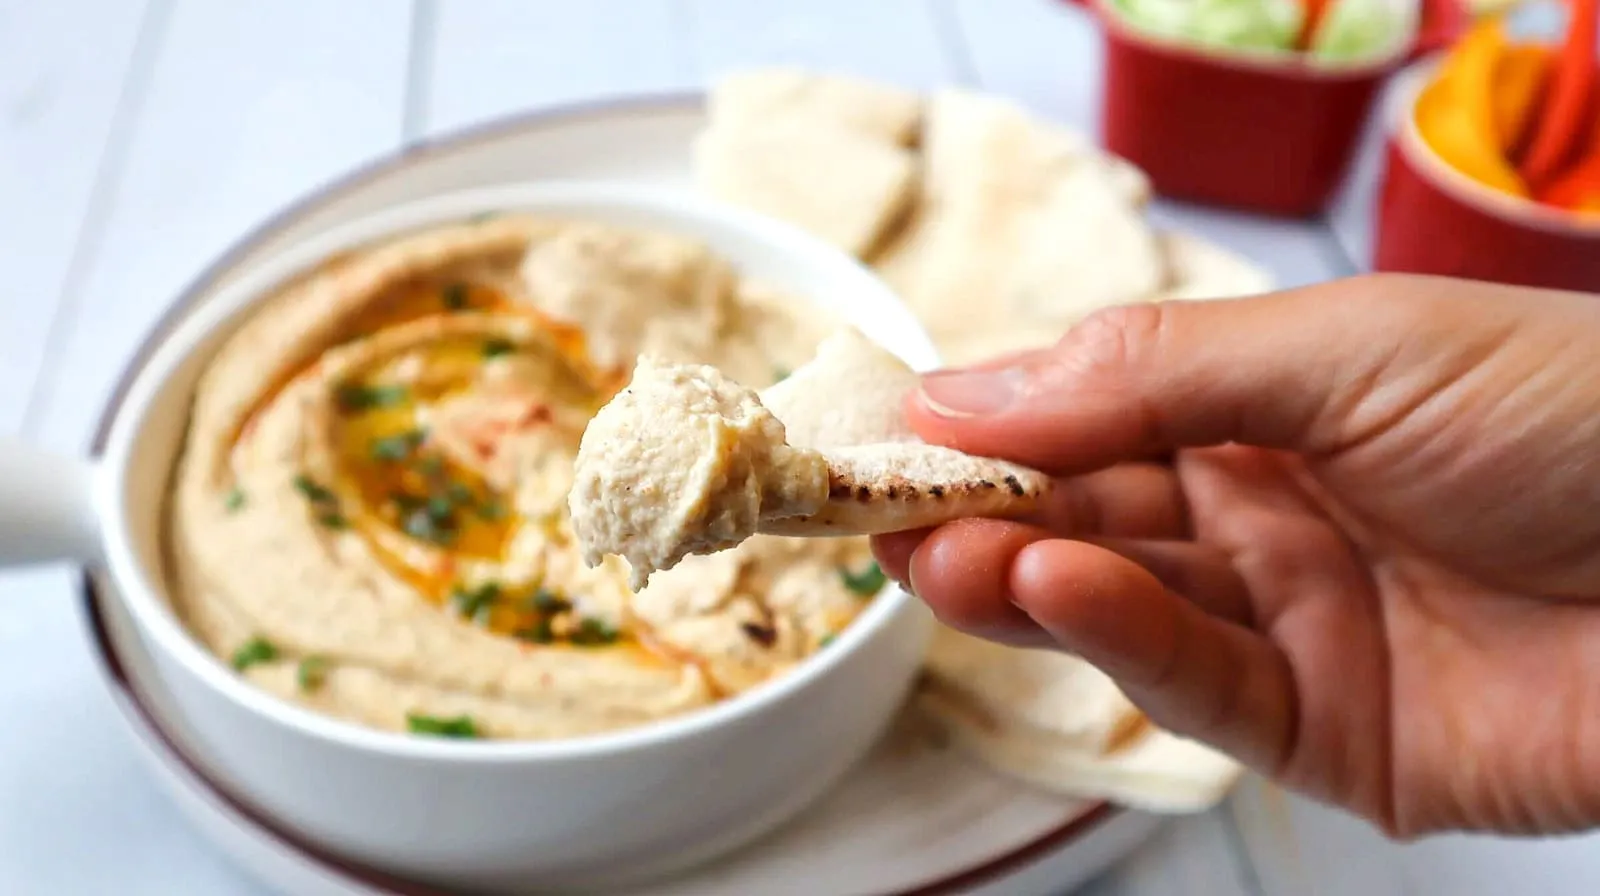
Ways to serve hummus: with classic pita bread
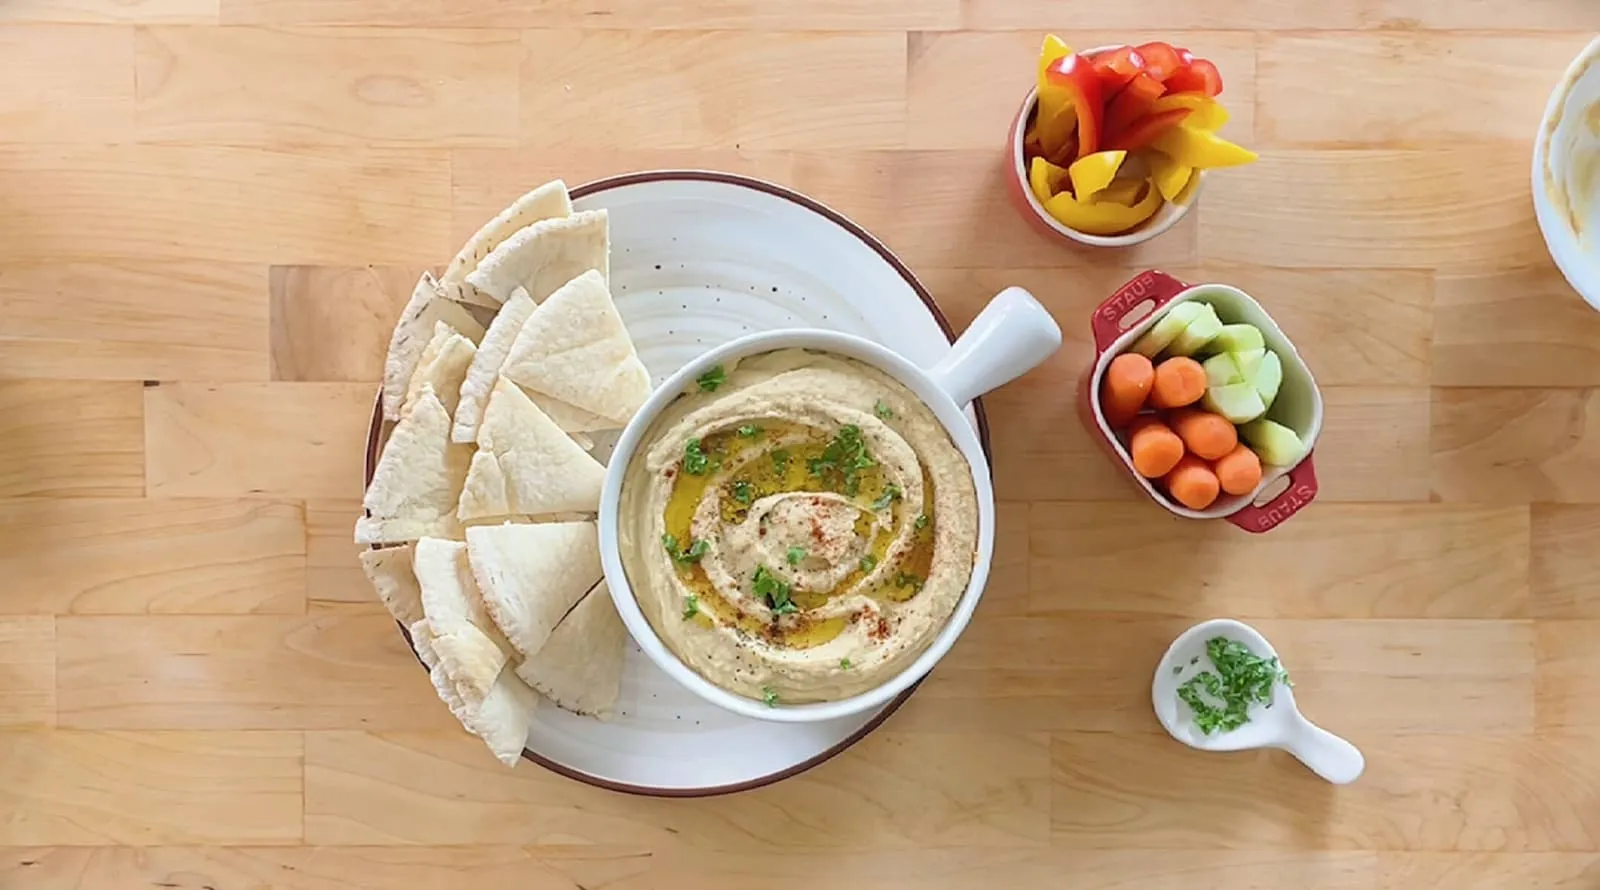
Before serving, drizzle a little olive oil over the hummus and sprinkle with paprika, dried or freshly chopped parsley, and chili flakes. Done!
My favorite is with classic 🫓 pita bread! Pita is pocket bread; when you heat it in a skillet, it puffs up from the middle! It’s often cut in half to make a pocket that you stuff with fillings. I usually buy pita at Costco.
To serve pita with hummus, warm the pita in a skillet over medium heat until it’s lightly browned, then take it out and cut it 3 times into 8 little triangles. Or you can go bold and tear it by hand! But freshly toasted pita is very hot, so I always cut it.
Hummus with pita is, in my heart, the most delicious way to eat it. The hot, toasty pita has my favorite wheaty aroma, and then you use it to scoop up a big mouthful of warm, fine, fluffy hummus. Yes, a big mouthful! Btw, this is my favorite Friday comfort food!
Sometimes I serve it with baby carrots, cucumber sticks, or bell pepper strips. That’s not traditional, but it’s a healthy snack I love. These vegetables have a mild flavor, so they’re delicious dipped in hummus.
Besides being a dip for pita and vegetable sticks, are there other ways to eat it? Of course! Here are some other ways I love:
* Add a scoop of hummus to a Buddha bowl or a salad. * Use hummus as the base on a plate and top it with grilled seasonal vegetables, roasted peppers, mushrooms, and more! * Use it as a base spread for pizza: spread a special tomato sauce and hummus on the pizza crust, add your other toppings, and bake in the oven. Or spread just the tomato sauce and toppings that need baking on the crust and bake it, then when it comes out of the oven, dot it evenly with little spoonfuls of hummus. *As a spread in sandwiches.
There are so many ways to eat it because I just love hummus so much, so I like it on and in anything I can spread it on or stuff it into.
How to store hummus
To store hummus you won’t eat right away, put it in a clean airtight jar, then pour a thin layer of olive oil over the top, just enough to completely seal the surface. This keeps the hummus from coming into contact with air and spoiling or drying out. It will keep in the fridge for 1 week.
Before eating, take it out of the fridge and let it come to room temperature. Sometimes I warm it in a pan or in the microwave so the hummus slowly softens back to a creamy texture.
Hummus can also be frozen, but the texture becomes a little less smooth. Again, put it in an airtight jar; for freezing you don’t need to add olive oil. Don’t fill the jar all the way, since hummus expands when frozen. The day before you want to eat it, move it to the fridge to thaw.
After writing so much, I really hope you all get a chance to try making it and enjoy how delicious hummus is for yourself!
Classic Hummus from Dried Chickpeas
- Prep
- 5 min
- Cook
- 55 min
- Total
- 1 hr
- Servings
- 8
Ingredients
Soaking the chickpeas
Cooking the chickpeas
Hummus
Instructions
Soaking the chickpeas
-
Give the chickpeas a quick rinse and put them in an airtight jar. Add 1.5L of cold water and 0.5 tsp of baking soda, seal the jar, and soak in the fridge for 8 hours or overnight. (Baking soda helps soften the chickpeas.)
Cooking the chickpeas
-
Put the chickpeas in a large enough pot, add 1.5L of water and 1 tsp of baking soda, and bring to a boil over medium-high heat. Once boiling, you'll see white foam floating on the surface; skim it off with a spoon and discard. Then turn the heat to low and simmer for 30 minutes.
-
After 30 minutes, open the lid, add 1 tsp of salt, and cook for about 15 more minutes, until the chickpeas are very soft. To test whether they're soft enough, press a chickpea with a fork; if it mashes effortlessly, they're done.
-
Drain the chickpeas and use a fork to pick out any skins that have come loose.
Making the hummus (stovetop)*
-
Put the cooked chickpeas in a food processor, add the tahini and garlic, and process for about 2 minutes until well combined. Stop partway through, open the lid, scrape down anything around the edges that hasn't mixed in, and continue.
-
Next, squeeze in the lemon juice, add the pink salt and a little black pepper, and keep processing.
-
Then slowly add the ice water, one spoonful at a time, until the hummus turns creamy and smooth
(Stop the food processor, open the lid, and scoop out a little hummus to taste. If needed, add more garlic, lemon juice, salt, pepper, and so on to your liking, then process again until combined.)
-
Before serving, drizzle a little olive oil over the hummus and sprinkle with paprika, dried or freshly chopped parsley, and chili flakes. Done!
(Hummus is best freshly made)
Notes
* Baking soda speeds up softening the chickpeas. If you don't have any, you can leave it out.
* For making hummus with a pressure cooker or multicooker, see the method in the post.
* Adjust the amounts of lemon, garlic, salt, black pepper, and so on to your liking. Always start small and add gradually, so the flavor doesn't get too strong to fix.
* For serving suggestions, see the ideas in the post.